Haruni was a labor of love from the start. My creative, experienced lace knitter friends started working on the
Haruni Shawl by Emily Ross, as a group project. At first, I thought about using a smooth, silky yarn for Haruni, but I was drawn back to the chosen Habu yarn for its uniqueness.
The yarn is 1/14 spiral slub. It's 51% wool, 20% polyester, 20% nylon. Lace knitters might make the following assumptions:
- Slub yarn? Forget it. The lace pattern won't show up well.
- Wool with polyester and nylon? Forget it. It won't block well.
- It's thread! Forget it. Too fine.
I couldn't help myself; it was a challenge. I knit a little swatch. The slubs made it more difficult to keep an even tension, but the texture was interesting enough to keep going. The yarn stretched and retracted in a weird way, probably due to the spiraling nylon and polyester. Blocking was going to be interesting.
The pattern is repetitive until you get to the border, which requires a bit of concentration to get it right. I added several repeats to get the size I wanted, since the thread was so fine, even though I was knitting with size US3 needles. I ended up with nine pairs of leaves per side, plus four center leaves. Big, open, superfine laciness.
I only had two cones of Habu, at 435 yards each. From the notes on Ravelry and the pattern, I gathered that I would need about half of my total yardage for the border. As the shawl gets bigger, I believe the ratio of border to shawl is reduced. I needed approximately half of my second cone for the border leaves.
Initially, I planned to use some light violet silk for the border. The silk is lovely, but it's much better suited to smaller needles and a denser fabric. It was purchased from John Marshall at Stitches West this year.
Instead, I stayed with the Habu and beaded the border! The tiny 11/0 seed beads are slightly iridescent and accent the purplish binding thread that runs through the shawl. The tough part of the beading process was the size of the beads and the slubbiness of the yarn. I used a size 12 steel crochet hook to add the tiny glass beads as I knit, and often I had a bit of trouble pulling those slubs through.
So, here are the blocking photos. I basically blocked it as I wanted it to look, rather than by any book or rule. However, I did use common sense and experience as guides.
 |
| Haruni unblocked and unwashed |
After laying out the shawl flat on my blocking board, I decided how I wanted to block it. It was too large for the board. My choices would be to a) block one half at a time, left side then right side, holding the center line straight with a blocking rod; b) block the main body and center point first, and finish the wing extensions separately afterward; c) use the big piece of berber carpet I have rolled up in the garage for the purpose of blocking large lace items. I chose (b).
First I soaked the shawl in a cool water bath for about five minutes. I added a drop of dishwashing liquid to the water and swirled it around, without too much agitation. I did squeeze the soapy water through it a couple of times. Then I rinsed with water of the same temperature.
 |
| Haruni in a cool water bath with a drop of dishwashing liquid |
 |
| Haruni rolled in a towel |
 |
| Gently squeezing Haruni to remove excess water |
After the wash, I pinned out the top center and bottom center of the shawl. I put the top edge on a rod -- except for the eight inches (or so) of wing extensions that I would block later.
 |
| Bottom center point pinned out |
 |
| Top center area on a blocking rod |
Then I pinned out every other pair of leaves, starting at the bottom, and working side to side -- two leaves on one side, then two leaves on the other side.
 |
| Pinning out every other pair of leaves |
Then I pinned out the rest of the leaves, just two loops in the middle of each pair of leaves. I tried to balance the two sides, so they would look about equal. This shawl is curved and very fine. You may hear knitters talk about blocking "by feel" or "by eye" -- basically, blocking using experience and common sense.
 |
| All the leaves pulled out and pinned |
Then I pinned out all of the loops for each pair of leaves, followed by the few loops in between each pair.
 |
| Pinning out all the loops |
Considering how many pins have to be pushed into a fairly rigid surface, I used this leather thimble. It has a small metal disk built into the thumb pad area, and is very comfortable to wear.
 |
| Leather thimble |
 |
| What happens when you push a pin too hard |
These are the wing extension I mentioned that needed to be blocked last. They extended too far over the edge of my blocking board. I could have been industrious and looked around for some foam or some other surface to use as an extension, but decided to block these after the main blocking was completed.
 |
| Wing extensions to be blocked last |
So I completed pinning the main body of the shawl, and I spritzed it with a bit of water. Some of the shawl had dried a bit while I was pinning. I wanted it to be evenly damp and dry evenly, holding its shape.
 |
| Spritzing the pinned shawl with a little water |
Then it was time for break.
 |
| Lovely dark chocolate from the only chocolate factory in San Francisco |
 |
| Pet the puppy |
Back to work. I unpinned the huge thing, laid a sheet down over the blocking board, and spread the shawl out again. This is because I planned on using spray starch to finish it, and didn't want the starch on my board.
To finish, I used no pins. I lightly sprayed one half of the shawl with Niagara spray starch. Then I laid a white pillowcase on top of the shawl and used a medium iron (wool setting is okay) and gently ironed on top of the pillow case. It's important to keep checking the piece underneath to make sure it's laying properly and to make sure your yarn doesn't melt! Remember, I was using a yarn with polyester and nylon components, so anything was possible. Also, if using beads, make sure that the beads are somewhat heat resistant. I've used Japanese glass beads before, and they hold up well under this type of blocking and a light iron. If possible, it's best to test a swatch first (I was impatient, but it would have been the smart thing to do). Some beads can melt or change color. You just have to be careful.
 |
| Haruni ready for a light starch |
Then I pinned out the wing extensions. This is where I made a slight error. When I sprayed a little water on the wing after it was pinned, I also dampened the pre-blocked area around it. No problem, right? But it did soften up the points on the leaves adjacent. I had to re-pin and block the points to make them sharp and pointy again.
 |
| Pinning out the wings |
I decided to be really picky and pin out a few more points as well. The loops were very reluctant to stay sharp, but I kept after them, and eventually, with pinning and starching, they behaved well.
 |
| Wings pinned with adjacent points repinned |
 |
| Final result on a black background |


 A little bit of Stitches goes a long way. For me, that means four or five hours of browsing, shopping, meeting friends, chatting with shop owners, and absorbing all of the silky, woolly, warm vibes at the Santa Clara Convention Center this past weekend.
 The Mannings booth was buzzing with activity, as was Tess Designer Yarns. The Yarn Barn was full of people browsing, but it seemed to me that purchasing lines were shorter here and throughout the Market. I was pleased to see the popularity of Intwined Pattern Studio, the design software that I purchased last year. Demonstrations at Intwined were lively, and it looked like people were buying.
 A vendor new to me, The Sanguine Gryphon, was attacked by shoppers on the first day of the show, I was told. And something they had was all gone by the end of the first day. What was it? I must know! The booth attendants were dressed in long gowns, their hair tied up in ribbons. Medieval times at a yarn show? Their yarn was scrumptious, and I picked up two skeins of some cashmere/silk fluffiness. Yum. I picked up these two handcarved shawl pins from Chappy (a.k.a., Purrfectly Catchy Designs). Don't they complement the yarn well? She's the vendor with the highligher tape, if you need some.
 I also stopped by Cheryl Oberle's booth and picked up her Knitted Jackets book. She graciously signed it for me and gave me a marbelized bookmark. She's always so lovely.
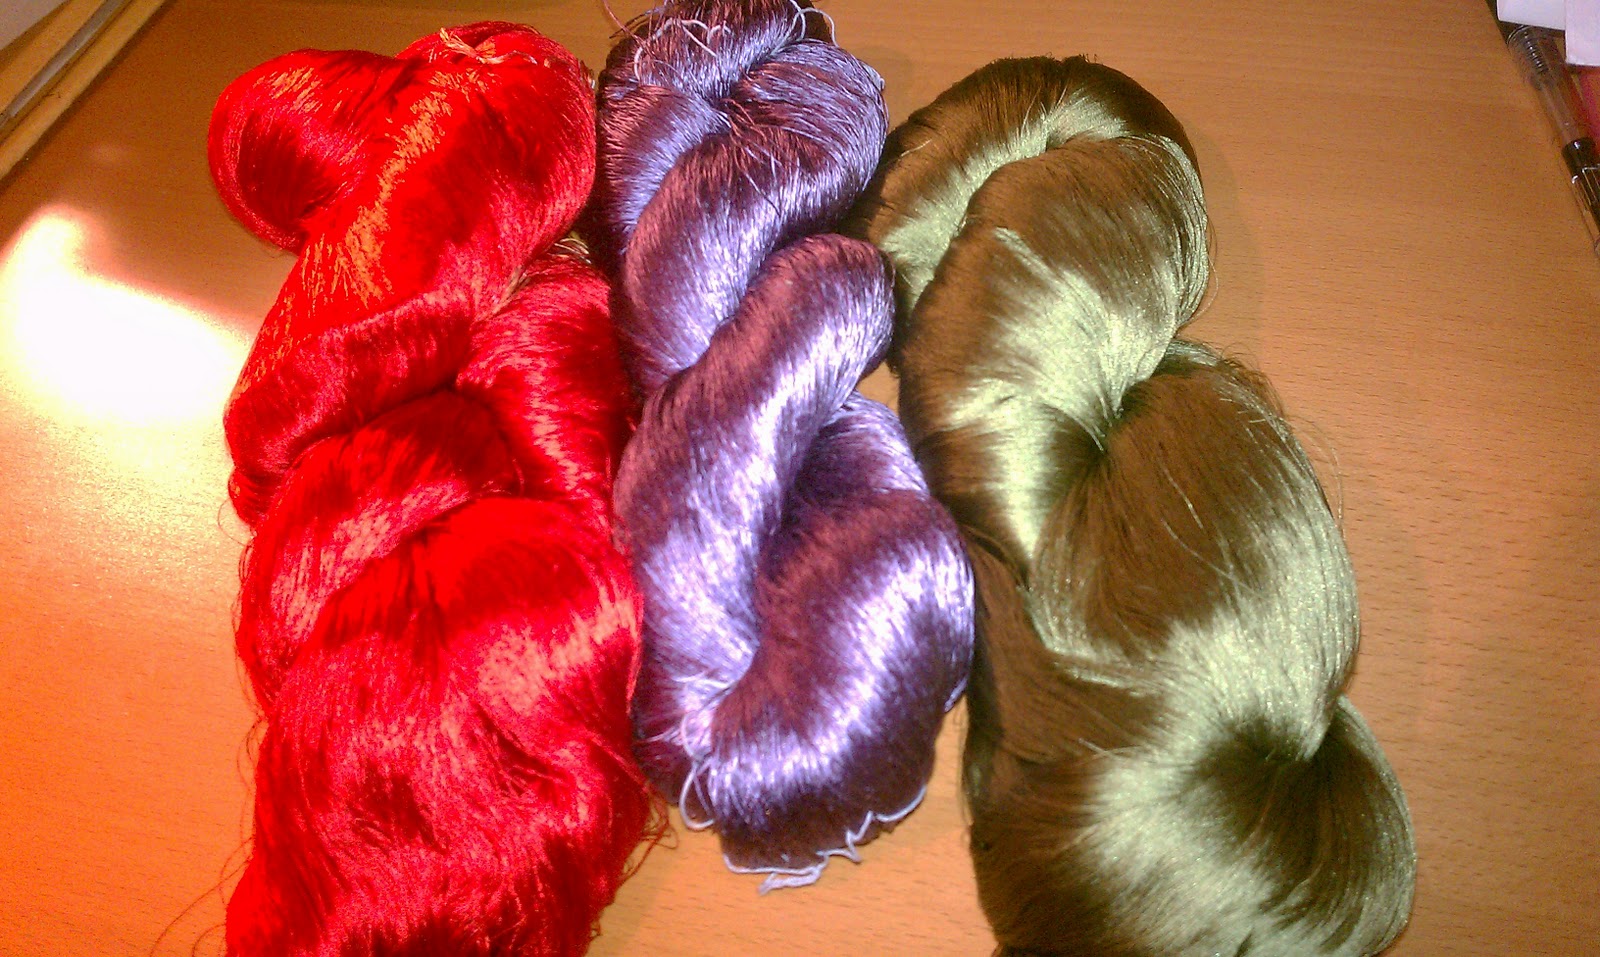
 I can't leave out the man with the Midas touch. The guy with the gold. The Japanese silk man. Who is he and where does he get this stuff each year? He is John Marshall of Covelo, CA and he buys out remaining stocks of Japanese textile companies. He also teaches and lectures in dying, stencil carving, and various Japanese and other arts. I purchased some extremely fine silk from him. I don't know yet what it will be, but the colors are stunning.
 And I do like this Handy Caddy I found. The plastic organizer snaps onto a steel frame that will stand up on a table. But you can unsnap it, and take just the plastic organizer with you in your knitting bag.


